Jobs and Triggers
Shakudo Jobs can be used to schedule one-time or recurrent tasks, depending on the kind of job selected in the Jobs menu

Creating a Job
Jobs can be created from the corresponding job menu (immediate or scheduled) depending on the desired job type. As the names imply, immediate jobs will run immediately while scheduled jobs will run on a configured schedule.
Shakudo supports various job types, including IPython notebooks and Python scripts.
Immediate Jobs
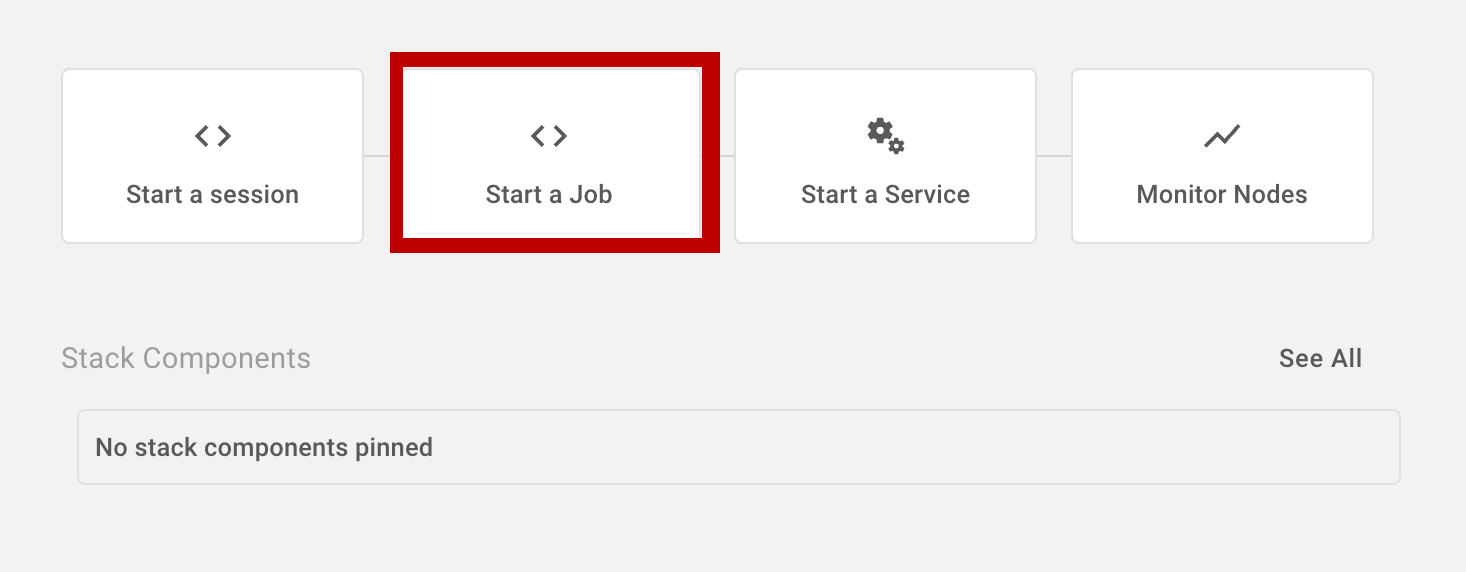
Immediate jobs can be created by clicking "start a job" on the Shakudo landing page.
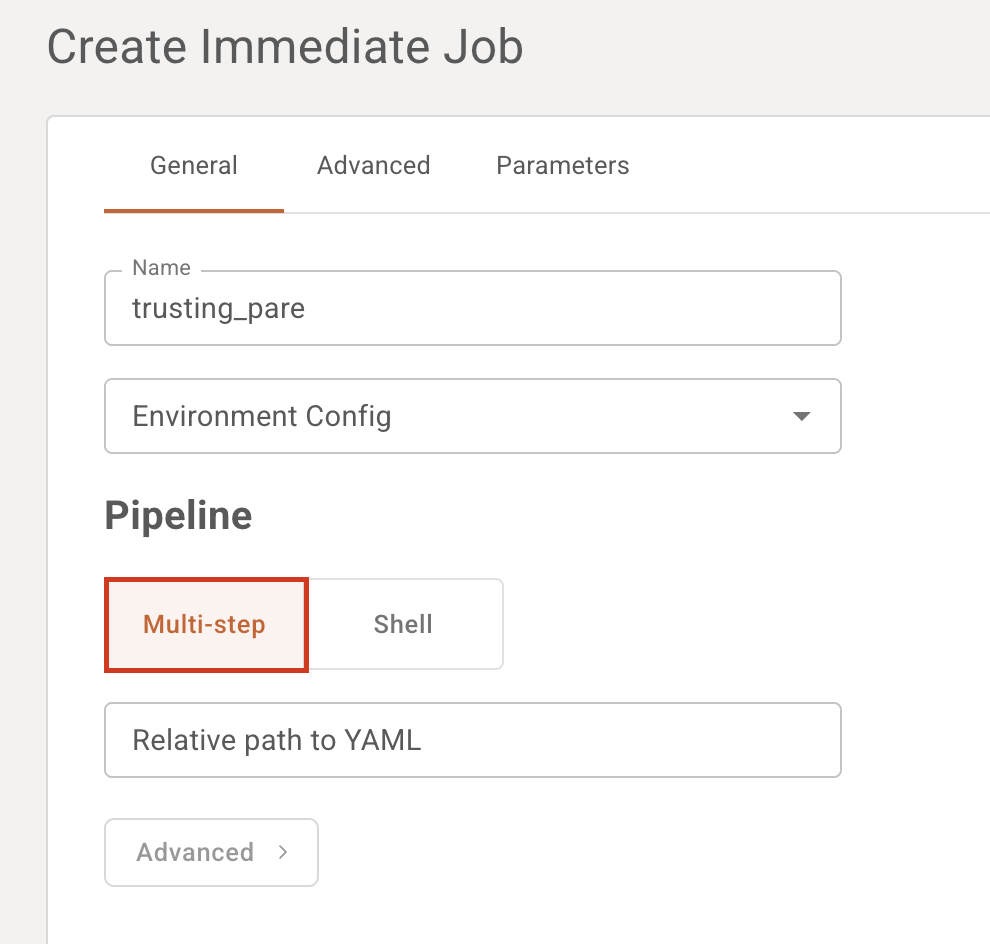
Creating a job involves, at minimum, filling in the job name (automatically generated by default), environment configuration (which works the same way as for Shakudo sessions or services), and specifying the job yaml specification as described above.
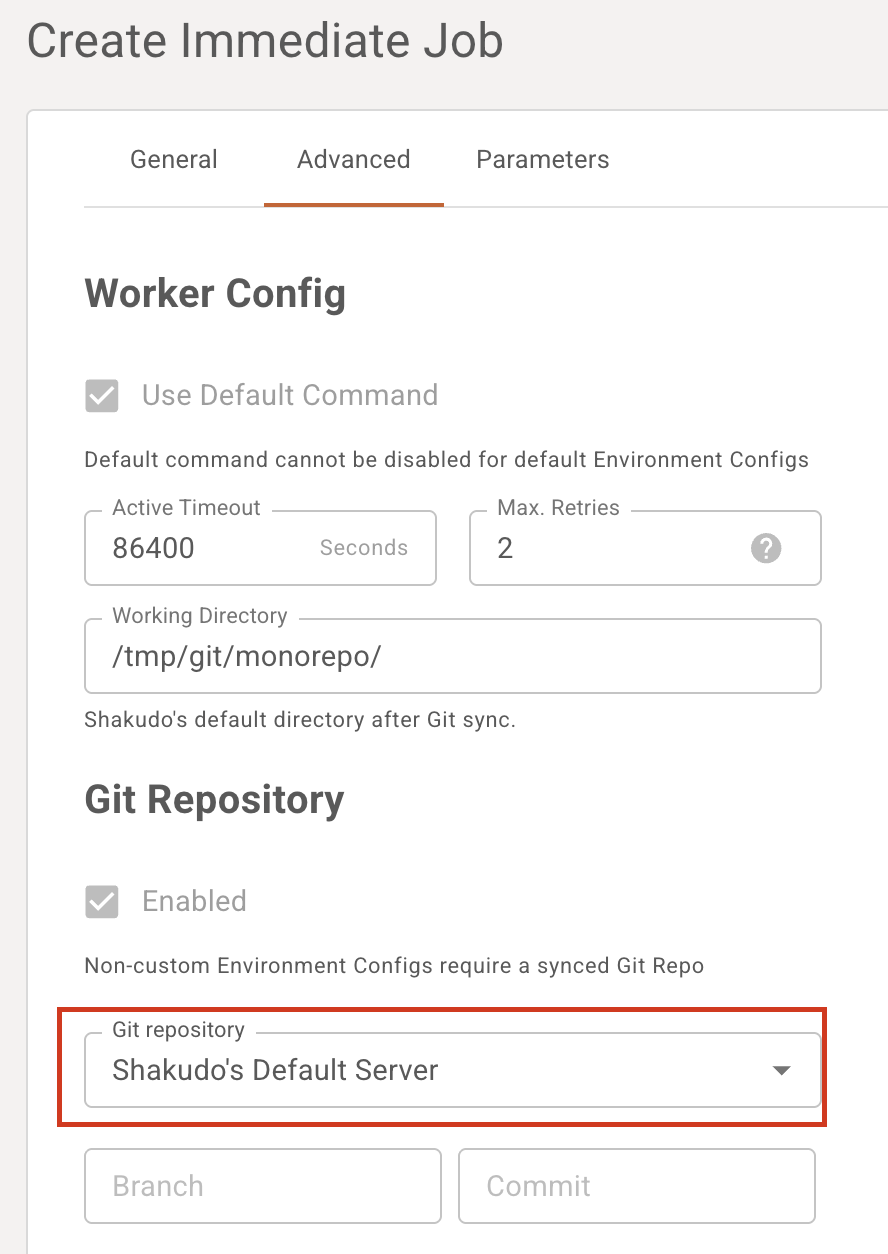
When using a non-default environment configuration, advanced settings like source git repository, job timeout, and job retry count can be modified to suit job requirements.
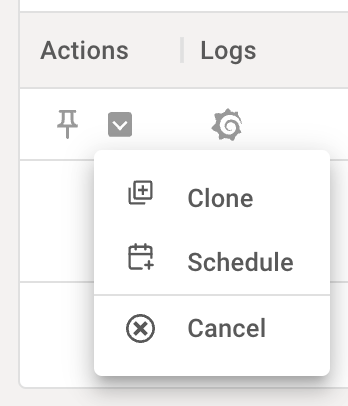
Immediate Jobs can be rerun as scheduled jobs from the immediate jobs page by using the actions menu (see Scheduled Jobs below), which will clone the job specification and change it into a Scheduled Job.
Scheduled Jobs
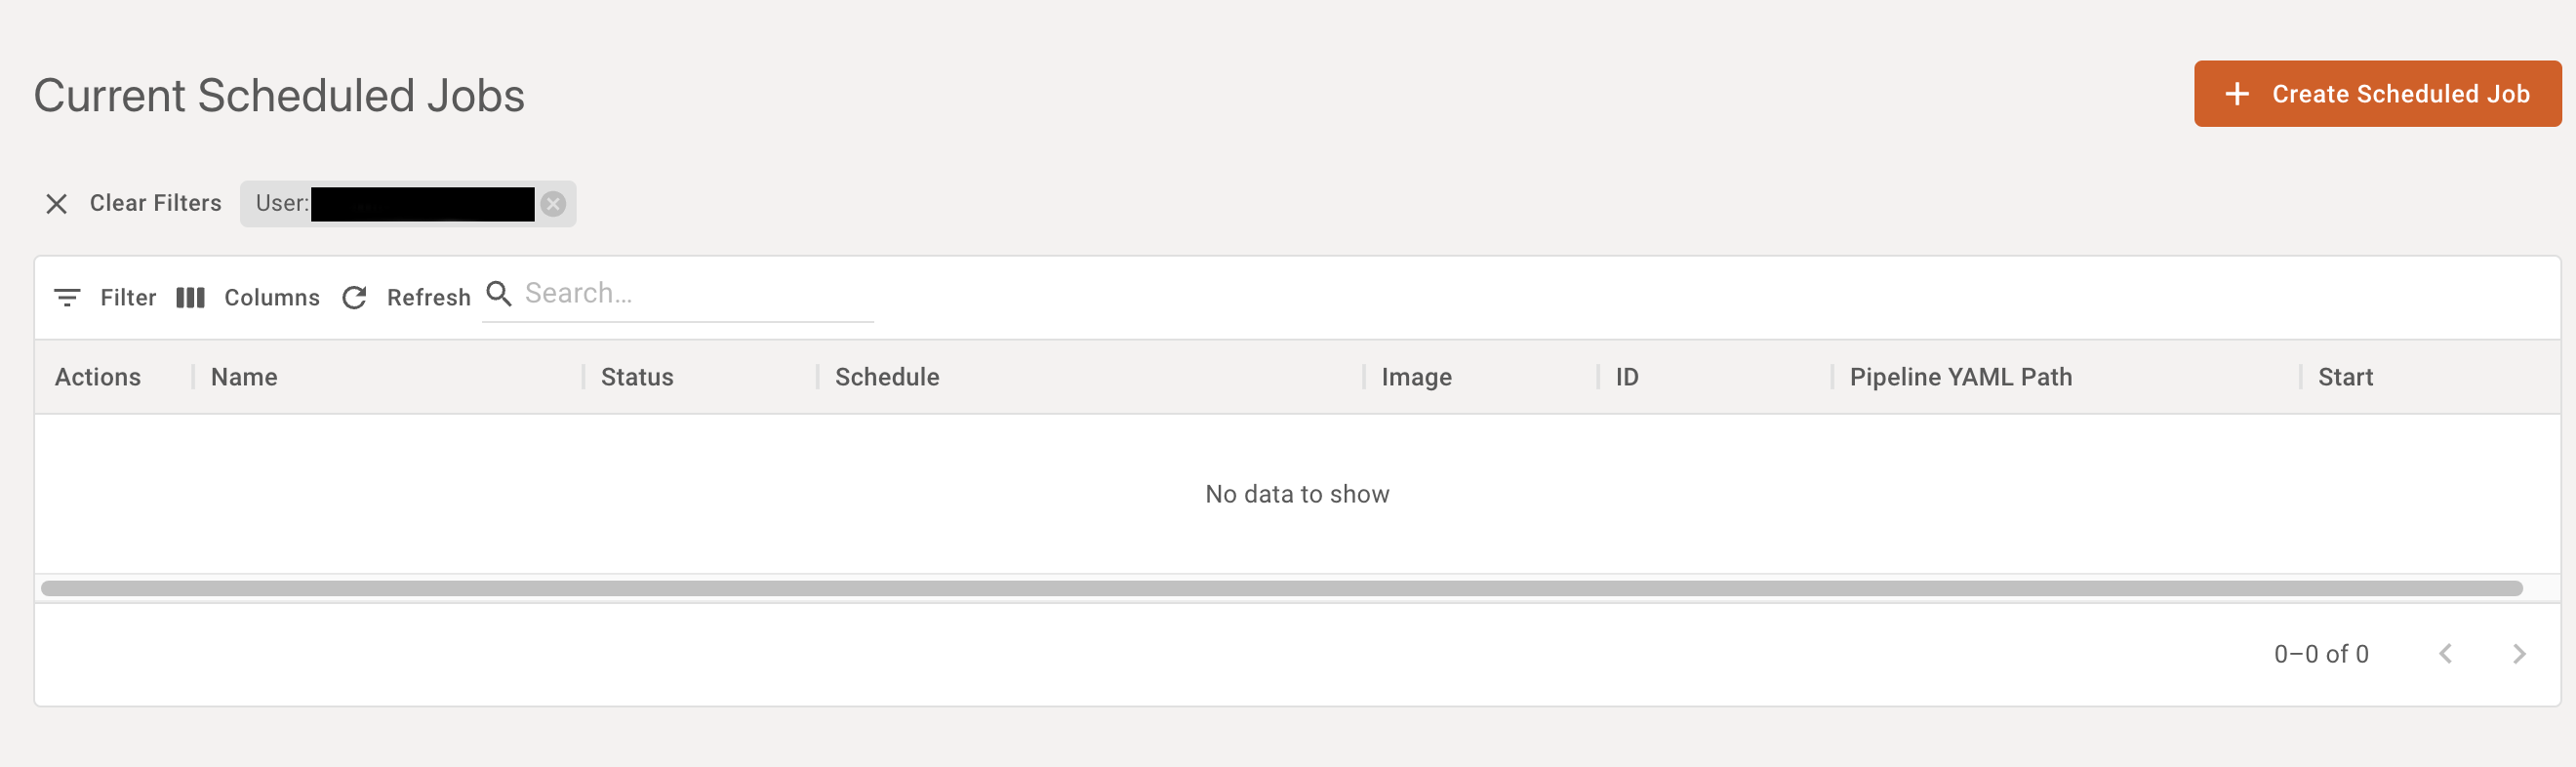
Scheduled jobs can be created from the Scheduled Jobs page by first selecting the appropriate menu item
And clicking on the "create scheduled job" button on the Scheduled Jobs page.
Scheduled jobs work like Immediate Jobs, except that a schedule in crontab format must be specified in addition to other basic fields.
Job Specification (multi-step)
Select "multi-step" under pipeline. Jobs are specified in a pipeline yaml format.
A basic pipeline yaml will resemble the below:
pipeline:
name: [name of your pipeline job]
working_dir: (optional) directory where pipeline is ran from (default is the root of the repository)
tasks:
  - name: “step1”
    type: type of file
    notebook_path: path to notebook
    notebook_output_path: output notebook location
    depends_on: run steps in parallel or specify dependencies
    working_dir: (optional) directory where task is ran from (default is the root of the repository)
When filling in a value for this template, enclose it in quotation marks (e.g., "step1").
Paths to files and directories, should be the relative paths in your repository.
For the type of file, the following are accepted:
- VS Code notebook:
vs code notebook - Python scripts:
python script,python, orpy - JavaScript:
js script,javascript, orjs - Jupyter notebooks:
jupyter notebook,jupyter,notebook, oripynb
Additional steps can be specified as per job requirements simply by adding more step entries within the tasks list.
Jobs can be specified for sequential, parallel, or mixed execution. Steps will run sequentially by default. Specifying dependencies using a list of strings in the depends_on field of a step entry allows steps to dispatch in parallel, so long as their dependencies (i.e. jobs, identified by name, which have to have completed execution before this step executes) are fulfilled. An empty list ([]) as a value for depends_on will dispatch the step immediately (since it has no dependencies), in parallel with other jobs that are ready to run.
The following example specifies a step to run in parallel:
  - name: “parallelStep”
    type: type of file
    notebook_path: path to notebook
    notebook_output_path: output notebook location
    depends_on : []
For more examples of pipeline yaml files, see the Shakudo examples repository
Below are example step specifications for job types supported by Shakudo.
To add a Jupyter notebook step:
  - name: "[your_step_name]"
    type: "jupyter notebook"
    notebook_path: "[notebook/path/relative/to/top/level/of/repo.ipynb]"
    notebook_output_path: "[some/notebook_output_name.ipynb]"
To add a VS Code notebook step:
  - name: "[another_step_name]"
    type: "vs code notebook"
    py_path: "[py/file/relative/to/top/level/of/repo.py]"
To add a Node.js JavaScript step:
  - name: "[another_step_name]"
    type: "js script"
    js_path: "[js/file/relative/to/top/level/of/repo.js]"
To add a bash script step:
  - name: "[another_step_name]"
    type: "bash script"
    bash_script_path: "[sh/file/relative/to/top/level/of/repo.sh]"
Head to the "Advanced" tab, and remember to select your Git repository. See the platform's tutorial on how to link your repo.
Bash Script (single step job)
If you only need to run a single step consisting of a bash script, select "Shell" instead of "Multi-step" in the Job creation dialogue.
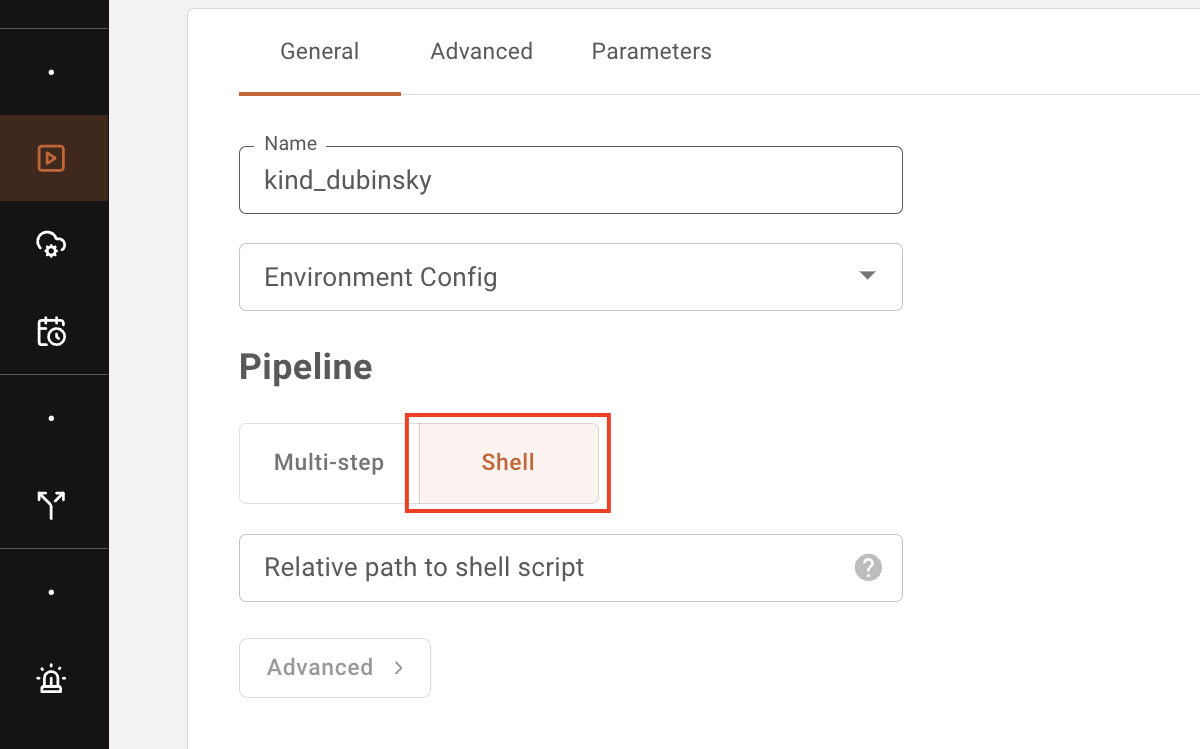
As you would for multi-step pipeline YAMLs, specify the path to the bash script relative to the root of your git repo.
An example bash script might look like the following:
#!/bin/bash
set -e
PROJECT_DIR="$(cd -P "$(dirname "${BASH_SOURCE[0]}")" && pwd)"

cd "$PROJECT_DIR"

pip install foo-package==bar-version
python ./a-script.py
Note the shebang for bash. The -e flag detects errors in the currently running script, and stops the script when one of the commands within returns a non-zero status. PROJECT_DIR finds the current directory of the current bash script. It is useful when you want to reference things relative to the current bash script.
Parameterizing Notebooks
Jupyter notebooks run as jobs can be parameterized. Parameters can then be specified in the job creation menu in the Parameters tab.
To prepare a notebook to use parameters in JupyterLab, click on the cog icon on the top right corner of the cell to parameterize and add a tag called parameters.
In VS Code, this is the "mark cell as parameters" option in the breadcrumb menu for the cell of interest.
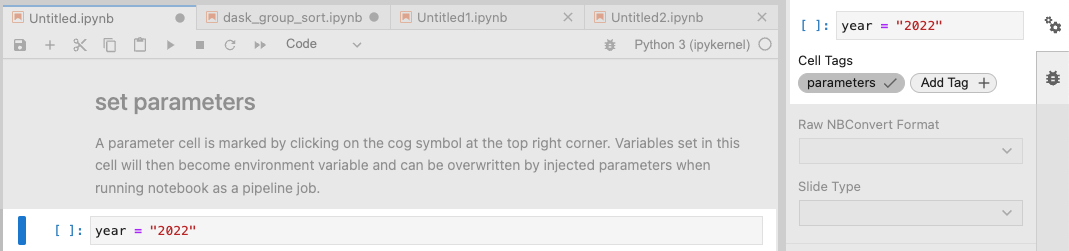
The cell's contents will be overwritten by the parameter's value as specified in the Parameters tab, if applicable.